


After recent announcement of Hotwire I started looking at the basecamp frontend stack closely. While I see the appeal of Turbo & Strada in the context of server-rendered applications, stimulus stands out in that it can be quite useful in a much wider range of applications.
In this post, we look at pairing lit-html and stimulus for fun and profit. This is a somewhat unorthodox combination because lit-html is typically used with web-component libraries (like lit-element) and stimulus is commonly used in server-rendered applications, but we will touch upon our motivation for pairing them in a later part (Jump to the Advantages section below if you wish).
A cursory look at lit-html
lit-html is an interesting HTML templating library from the polymer team which supports efficient rendering as well as re-rendering of those templates into the DOM.
The last part is what makes it stand out from conventional text templating libraries like mustache, liquid etc. where to re-render a template we would usually wipe out the entire subtree and replace the innerHTML completely.
It is also much less opinionated than libraries like React. Also, in contrast to React, it doesn't maintain a parallel in-memory representation of the entire DOM tree (virtual DOM) while still offering efficient replacement of the dynamic parts.
Using stimulus with lit-html
While we will get back to why we are doing this in a bit, it might be helpful to look at a code sample that illustrates lit-html and stimulus working together.
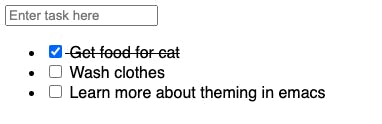
We will start out with the simplest task planner possible.
Our state, for now, is maintained in a simple JS array:
const tasks = [
    /* What our array will contain (eventually):
    {
        id: 1,
        content: "Wash clothes",
        done: false
    }
    */
];
Now, we define some utility functions that render our tasks through lit-html:
// Our top level template can delegate to other template renderers:
const appTemplate = ({ tasks }) => html`
  <div>
    ${todoListTemplate(tasks)}
  </div>`;
const todoListTemplate = (tasks) => html`
  <input
    type="text"
    placeholder="Enter task here"
  >
  <ul>
    ${tasks.map((task) => taskTemplate(task))}
  </li>`;
const taskTemplate = (task) => html`
  <li
    style=${task.done ? "text-decoration: line-through" : ""}
  >
    <input type="checkbox" ?checked=${task.done} ? />
    ${task.content}
  </li>`;
(Our templates can make use of variables we passed to them and inject them into the rendered content as well as derive attributes/styles etc. from these values).
Note that we haven't done anything yet to make this interactive (handle user events). We will get to them in a bit (using stimulus).
We can render the top level appTemplate renderer in a DOM node:
render(appTemplate({ tasks }), document.getElementById("app"));
At this point we will see an empty input box and nothing is gonna happen when we click on it.

Now, let us make this interactive by adding stimulus:
The primary abstraction offered by stimulus is the concept of controllers.
We define behavior in controllers, and associate them with markup through data attributes.
So, if we have a TodoController we can associate it with our top level node through a data-controller attribute:
const appTemplate = ({ tasks }) => html`
  <div data-controller="todo">
    ${todoListTemplate(tasks)}
  </div>
`;
(This entire stringly-typed business is a bit icky if you are typescript aficionado, but bear with me for now).
Once our controller has been attached, we can bind event handlers (methods in the controller) through more data attributes:
const todoListTemplate = (tasks) => html`
  <input
    type="text"
    placeholder="Enter task here"
    data-action="keydown->todo#handleKeyDown"
  >
  <ul>
    ${tasks.map((task) => taskTemplate(task))}
  </li>
`;
(keydown event will be handled by handleKeyDown method of TodoController).
Similarly, we can handle click action on the todo item to toggle done state of the task:
const taskTemplate = (task) => html`
  <li
    style=${task.done ? "text-decoration: line-through" : ""}
    data-id=${task.id}
    data-action="click->todo#toggleTask"
  >
    <input type="checkbox" ?checked=${task.done} ? />
    ${task.content}
  </li>
`;
So, now what does our controller look like:
import { Controller } from "stimulus";

// A simple counter to get new ids for every ids
//
// If you are actually syncing the todos to a server, you'd want to use a uuid generator
let counter = 0;

class TodoController extends Controller {

  // Event handlers which will be invoked by stimulus based on the data-action attributes
  toggleTask(event) {
    const taskId = event.target.dataset.id;
    tasks = tasks.map((task) =>
      task.id == taskId
          ? { ...task, done: !task.done }
          : task
    );
    this.rerender();
  }

  handleKeyDown(event) {
    if (event.key === "Enter") {
      tasks.push({
        id: ++counter,
        content: event.target.value,
        done: false
      });
      this.rerender();
    }
  }

  rerender() {
    // this.element is the element to which we added the data-controller attribute
    render(todoListTemplate(tasks), this.element);
  }
}
The rerender function is the only part that is lit-html aware and will takes care of re-rendering the template after the our tasks array has been updated.
At this point our tasks array is a plain js array, so we don't have a mechanism to subscribe to it, so whenever we modify the array, we will need to call the rerender function ourselves (Not cool, but works).
All that is left to do, is hooking up our controller into the Application singleton provided by stimulus:
import { Application } from "stimulus";

const application = Application.start();
application.register("todo", TodoController);
//                               ^ The name here ("todo") should match
//                                  what we passed to the data-controller attribute
(If you are using webpack, there is a fancier way to auto-register all controllers but that is besides the core focus of this article).
Believe it or not, our todo list actually works now:
Advantages:
If you are familiar with lit-html (or look into the docs) event handling through stimulus may seem unncessary. lit-html offers its own event handling mechanism.
Nothing wrong with that approach, but note one thing: If you are server rendering your templates (look at the lit-html-server project) - you'd need to load the templates atleast twice. Once the pre-rendered HTML and second the javascript representation that can be used for re-rendering.
However, in our implementation, the controller that invokes rerender does not need the javascript representation until the rerender is actually called. So we can use dynamic imports / code-splitting and load our template only when needed.
  rerender() {
    import('./todo-list-template').then(template =>
      render(template(tasks), this.element)
    );
  }
To emphasise, we can easily server-render our UI when using libraries like React, Angular etc. but if we need our components to be interactive on the client-side, we'd need the JS code for the component (including the JS representation of our templates) before we can handle a single click.
This is not the case here: Given the controller-view separation, we need the controller to handle interactions on the client, but we need the view (template rendering functions) only when we need to actually update the content.
This allows for more fine grained code-splitting and is not so easy to do with libraries like React.
Some obligatory cleanup:
Our list rendering strategy is not ideal here, and we should be using a repeat directive for rendering lists (The motivation is similar to why we need key attribute in react, the linked docs explain it in more detail):
import { repeat } from "lit-html/directives/repeat";

const todoListTemplate = (tasks) => html`
  <input
    type="text"
    placeholder="Enter task here"
    data-action="keydown->todo#handleKeyDown"
  >
  <ul>
    ${repeat(
      tasks,
      (task) => task.id, // Unique key for each task
      (task) => taskTemplate(task)
    )}
  </li>
`;
Making things reactive:
Calling rerender ourselves doesn't quite cut it in 2020 (almost 2021 :P) and in JS ecosystem we have a plethora of state-management micro-libraries. One that I particularly like is Effector, which is quite feature rich for a 9.5k bundle.
Let's quickly see how our toy todo list will look like with some state management thrown in.
Let's setup our store first (Effector's store follow a unidirectional data flow approach that you might be familiar from redux etc.):
// Create a store which will contain all our tasks
const tasksStore = createStore([]);

// Create events:
//
// In effector terminology, events are both event dispatchers
// as well as event emitters
const addTask = createEvent();

// So we can do something like:
// addTask({ ... }) to trigger this event
// and addTask.watch(() => { ... }) to subscribe to this event

const toggleTask = createEvent();

// Configure our store to handle these events:

tasksStore.on(addTask, (tasks, task) => [...tasks, task]);

tasksStore.on(toggleTask, (tasks, { taskId }) =>
  tasks.map((task) =>
    task.id == taskId ? { ...task, done: !task.done } : task
  )
);
Let's hook our controller to use that instead of the vanilla array:
class TodoController extends Controller {
  constructor(context) {
    super(context);
    // Whenever our store updates - rerender the template
    tasksStore.watch((tasks) => this.rerender(tasks));
  }
  toggleTask(event) {
    const taskId = event.target.dataset.id;
    toggleTask({ taskId });
  }
  handleKeyDown(event) {
    if (event.key === "Enter") {
      addTask({
        id: ++counter,
        content: event.target.value,
        done: false
      });
    }
  }
  rerender(tasks) {
    render(todoListTemplate(tasks), this.element);
  }
}
The repeated calls to rerender are now gone, as we have configured our constructor to rerender the template whenever state updates.
You can try out this implementation in the sandbox here.
Caveats:
No such thing as free lunch, yadda, yadda ...
If you see the snippet above, one interesting thing is how we didn't have to tell stimulus that the DOM has been updated (through lit-html) and it was still able to handle the events for newly added DOM nodes. You can add a task, and click on it to mark it as done. We didn't do anything to subscribe stimulus to lit-html.
The reason it works is because stimulus subscribes to the DOM itself - through mutation observers. So any DOM modification triggers a rescanning of the relevant subtrees so that stimulus can intercept the data attributes in newly added DOM nodes.
This allows us the flexibility to server-render our templates, replace whole or parts of the page dynamically as we deem fit, without ever telling stimulus to re-traverse the DOM.
This has an associated overhead (though it can be significant only if the DOM tree is complex and large subtree heads are frequently changing) but that can be eliminated if the UI framework completely controls the rendering lifecycle - à la React.
So, 'tis important to evaluate your options logically and methodically.
(Cover image courtesy: Pavel Danilyuk, through Pexels)